Instead of just slapping textures on polygons, ray tracing lets us simulate how light interacts with surfaces, giving us those jaw-dropping reflections and realistic lighting effects that make you go, “Wow!”
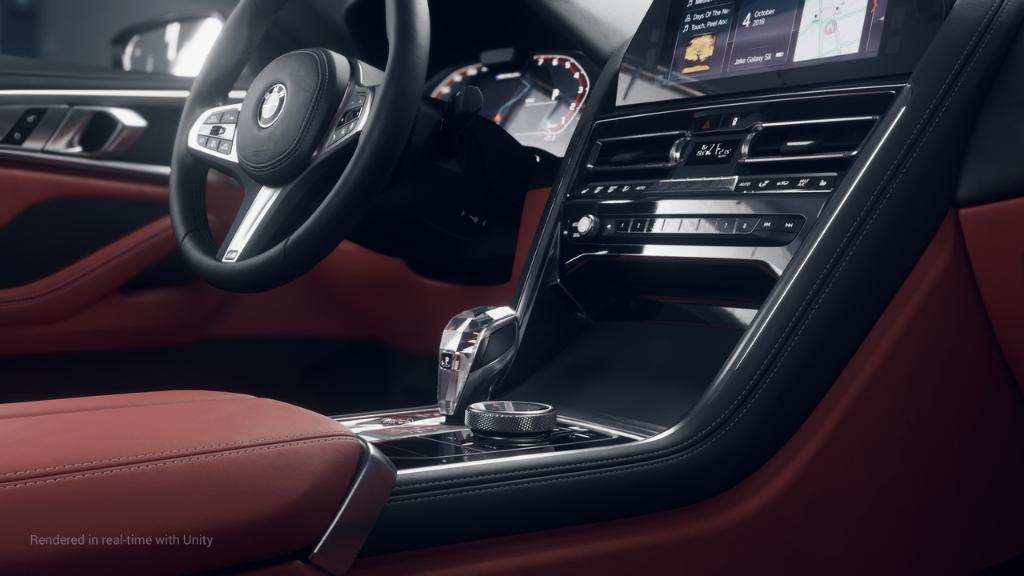
In this article, I’ll take you on process of building a simple ray tracing shader in Unity using HLSL.
The Ray Tracing Lowdown
So, what’s the deal with ray tracing? Imagine you’re in a dark room, and you turn on a flashlight. The way the light bounces around and illuminates the objects is basically what ray tracing does, but with a lot more math involved.
The Ray Equation: The Basics
At the heart of ray tracing is the concept of a ray. A ray is defined by two things: its origin (O) and its direction (D). Think of it as an arrow shooting from your camera into the scene. The equation for this bad boy looks like this:
1
P(t) = O + t * D
Where:
Ois where the ray starts (your camera).Dis the direction it’s heading (straight through the pixel on your screen).tis a little time variable that helps us find points along the ray.
Now that we have our ray, let’s dive into the shader code!
1. Setting Up Our Shader
Every shader starts with a couple of basic components: the vertex shader and the fragment shader. In our ray tracing adventure, the vertex shader is like the warm-up act, prepping everything before the main event happens in the fragment shader.
Here’s a sneak peek at how it looks:
1
2
3
4
5
6
7
8
9
10
11
12
13
14
15
16
struct appdata {
    float4 vertex : POSITION;
    float2 uv : TEXCOORD0;
};

struct v2f {
    float2 uv : TEXCOORD0;
    float4 vertex : SV_POSITION;
};

v2f vert(appdata v) {
    v2f o;
    o.vertex = UnityObjectToClipPos(v.vertex); // Transform the vertex
    o.uv = v.uv; // Pass those sweet UV coordinates along
    return o;
}
What’s Happening Here?
- The
vertfunction is transforming our 3D vertices into 2D screen space so we can see them. Easy peasy! - The UV coordinates are passed along because we’ll need them later for texturing.
2. Meet the Ray Structure
Now, let’s create a structure to hold our ray. This will make it super easy to manage its properties as we bounce around the scene.
1
2
3
4
struct Ray {
    float3 origin; // Where our ray starts
    float3 dir;    // The direction it’s heading
};
This struct is like a cool backpack that holds our ray’s origin and direction. Time to get our math game on!
3. Ray-Sphere Intersection
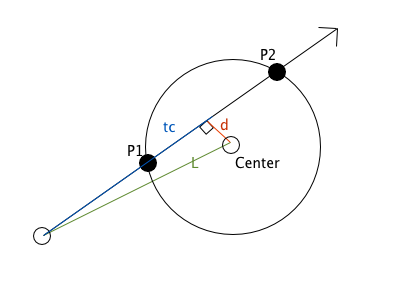
One of the easiest shapes to start with is a sphere. To figure out if our ray hits the sphere, we can use some basic algebra. The equation of a sphere is:
1
(x - xc)^2 + (y - yc)^2 + (z - zc)^2 = r^2
We can plug our ray equation into the sphere equation and end up with a quadratic equation. Yup, it’s time to channel our inner mathematician!
Here’s the code to do the heavy lifting:
1
2
3
4
5
6
7
8
9
10
11
12
13
14
15
16
17
18
19
20
21
HitInfo RaySphere(Ray ray, float3 sphereCentre, float sphereRadius) {
    HitInfo hitInfo = (HitInfo)0;
    float3 offsetRayOrigin = ray.origin - sphereCentre;

    float a = dot(ray.dir, ray.dir);
    float b = 2 * dot(offsetRayOrigin, ray.dir);
    float c = dot(offsetRayOrigin, offsetRayOrigin) - sphereRadius * sphereRadius;

    float discriminant = b * b - 4 * a * c;

    if (discriminant >= 0) {
        float dst = (-b - sqrt(discriminant)) / (2 * a);
        if (dst >= 0) {
            hitInfo.didHit = true;
            hitInfo.dst = dst;
            hitInfo.hitPoint = ray.origin + ray.dir * dst;
            hitInfo.normal = normalize(hitInfo.hitPoint - sphereCentre);
        }
    }
    return hitInfo;
}
Breaking It Down
- We’re checking for hits using a discriminant. If it’s non-negative, we’ve got an intersection!
- If
t(the distance along the ray) is positive, we’ve successfully hit the sphere, and we can calculate the normal at the hit point.
4. Ray-Triangle Intersection: Möller-Trumbore
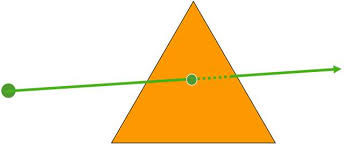
Triangles are everywhere in 3D graphics, so we need to know how to hit those bad boys too. Enter the Möller-Trumbore algorithm. This nifty little method uses some clever vector math to check for intersections.
Here’s the code for it:
1
2
3
4
5
6
7
8
9
10
11
12
13
14
15
16
17
18
19
20
21
22
HitInfo RayTriangle(Ray ray, Triangle tri) {
    float3 edgeAB = tri.posB - tri.posA;
    float3 edgeAC = tri.posC - tri.posA;
    float3 normalVector = cross(edgeAB, edgeAC);
    float3 ao = ray.origin - tri.posA;
    float3 dao = cross(ao, ray.dir);

    float determinant = -dot(ray.dir, normalVector);
    float invDet = 1 / determinant;

    float dst = dot(ao, normalVector) * invDet;
    float u = dot(edgeAC, dao) * invDet;
    float v = -dot(edgeAB, dao) * invDet;
    float w = 1 - u - v;

    HitInfo hitInfo;
    hitInfo.didHit = determinant >= 1E-6 && dst >= 0 && u >= 0 && v >= 0 && w >= 0;
    hitInfo.hitPoint = ray.origin + ray.dir * dst;
    hitInfo.normal = normalize(tri.normalA * w + tri.normalB * u + tri.normalC * v);
    hitInfo.dst = dst;
    return hitInfo;
}
What’s the Math Behind It?
- The algorithm calculates if our ray hits the triangle by checking the determinant and using barycentric coordinates (u, v) to ensure the hit point is inside the triangle.
- If all conditions are met, we’ve hit the triangle and can calculate the normal at the intersection point.
5. Let There Be Light: Lighting and Reflections
Now that we can trace rays and find intersections, it’s time to talk lighting. We want our objects to look lively, right?
The basic lighting formula we’ll use is:
1
L = C + sum(Ri * Li)
Where:
Cis the base color of the surface.Riis the reflection coefficient for each light source.Liis the intensity of incoming light.
Here’s how we’ll trace rays through our scene:
1
2
3
4
5
6
7
8
9
10
11
12
13
14
15
16
17
18
19
float3 Trace(Ray ray, inout uint rngState) {
    float3 incomingLight = 0;
    float3 rayColour = 1; // Start with a clean slate

    for (int i = 0; i < MAX_BOUNCES; i++) {
        HitInfo hitInfo = Cast(ray); // Cast the ray to find hits

        if (hitInfo.didHit) {
            float3 normal = hitInfo.normal;
            ray = ReflectRay(hitInfo.hitPoint, normal, ray); // Reflect the ray
            rayColour *= hitInfo.color; // Mix colors
            incomingLight += CalculateLighting(hitInfo); // Gather light
        } else {
            break; // No hit? Time to call it a day!
        }
    }

    return incomingLight * rayColour; // The final masterpiece
}
Why It Works
- For each bounce of the ray, we calculate how much light is hitting the surface and reflect the ray off the surface.
- By accumulating colors and light values, we get that rich, immersive look that ray tracing is known for!
Wrapping It Up
And there you have it, folks! By combining HLSL with some good old math, you can create a ray tracing shader that brings your scenes to life. Sure, ray tracing is a bit of a resource hog, but the results are absolutely worth it!
I hope you had as much fun reading this as I did writing it. Now, go forth and light up your projects with ray tracing magic! Experiment with different shapes and lighting scenarios, and watch as your graphics leap off the screen!
Until next time, happy coding!